« Moving, Downsizing, New Phase | Main | Review of Note-Taking Apps 2023 September »
SteamDeck and Upgrade
By Derek | June 22, 2023

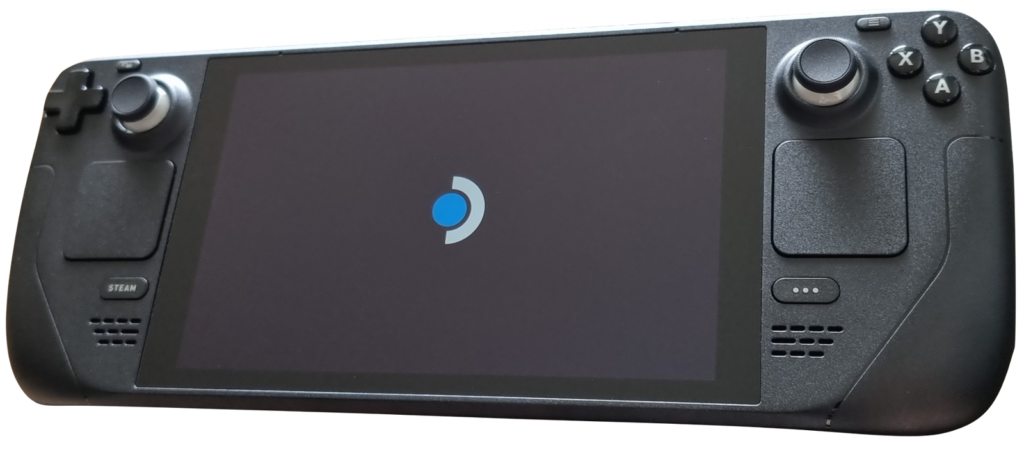
Recently, I purchased a SteamDeck. I’d wanted to buy one, but I wanted it to be able to hold a good amount of games.
As of this posting, the SteamDeck comes in three different capacities.
- $399 for 64GB storage
- $529 for 256GB storage
- $649 for 512GB Storage
With the sizes of games these days, at least for modern AAA games, all but the largest capacity one won’t hold too many games. As an example, Read Dead Redemption II is about 130GB, so it won’t even fit on the smallest one, and fills up 1/4 of the largest one they sell.
It turns out, the NVME drive in the SteamDeck is user upgradeable, and not that difficult to do.
So, I bought the smallest capacity one, with full intentions to upgrade it.
If you’re worried about voiding your warranty, you could read this, from iFixit. Essentially, opening up the ‘Deck doesn’t void your warranty, unless you break something while you’re doing it.
The trickiest part is purchasing a larger drive in the correct physical size, a 2230 NVME.
You can buy a 2TB (2000GB) replacement drive on AliExpress for about $170. I found this reputable seller link from a YouTuber. The only downside with this method is that it takes a few weeks to arrive. I waited two weeks after I ordered the drive to order my SteamDeck, and the ‘Deck was still delivered first. The drive I ordered from AliExpress was a Western Digital drive.
Now, however, it appears that iFixit also now has a SteamDeck Upgrade Kit which comes with the appropriate tools. iFixit’s kit comes with a Micron-branded drive. Note that I’ve linked to the 2TB model, with the tools, but you could always swap out for the bare drive if you already have the tools you need. The toolkit version only adds $5 to the price, so it’s a good deal either way.
Both drive brands are reliable, so you should be good whichever way you go.
I’m only going to summarize the process here, then link to the appropriate tutorials.
Step 1:
- Setup your new SteamDeck, or have one available you’d like to upgrade.
- Order your upgrade drive.
- If you’re going to clone your drive, you’ll need an NVME enclosure, otherwise, you’ll need a USB-C flash drive.
Step 2: Clone your internal drive to the new one. I own my own NVME enclosure, as I clone drives for friends and family regularly. Using the built-in Linux desktop to clone the drive is fairly straightforward, and doesn’t take too long. This seems to be easier than installing fresh.
Step 3: Put the SteamDeck in Battery Storage Mode before you open it.
Step 4: Swap out the original drive for the new one. If you’ve cloned the drive, you’re pretty much done, otherwise, you’ll have to create a USB-C flash drive boot image to install SteamOS on the replaced, blank drive. I haven’t personally used this method, yet.
Hope this helps, I’ve gathered all the links, below, as well.
Links:
- Product SteamDeck
- Product 2TB (2000GB) replacement drive on AliExpress (you only need this or the next one, not both)
- Product SteamDeck Upgrade Kit (you only need this or the previous one, not both)
- Product NVME enclosure (only if you want to clone your drive, which is easier)
- Tutorial Clone your internal drive to the new one (easiest method, but you’ll need the NVME enclosure)
- Tutorial Put the SteamDeck in Battery Storage Mode
- Tutorial Swap out the original drive for the new one
- Tutorial create a USB-C flash drive boot image to install SteamOS (if you didn’t clone your drive)
- Warranty Info voiding your warranty, you could read this, from iFixit
- Video TechHut on YouTube
- Game Read Dead Redemption II
Topics: Entertainment, Games, Me, Technology | No Comments »
Comments
You must be logged in to post a comment.


